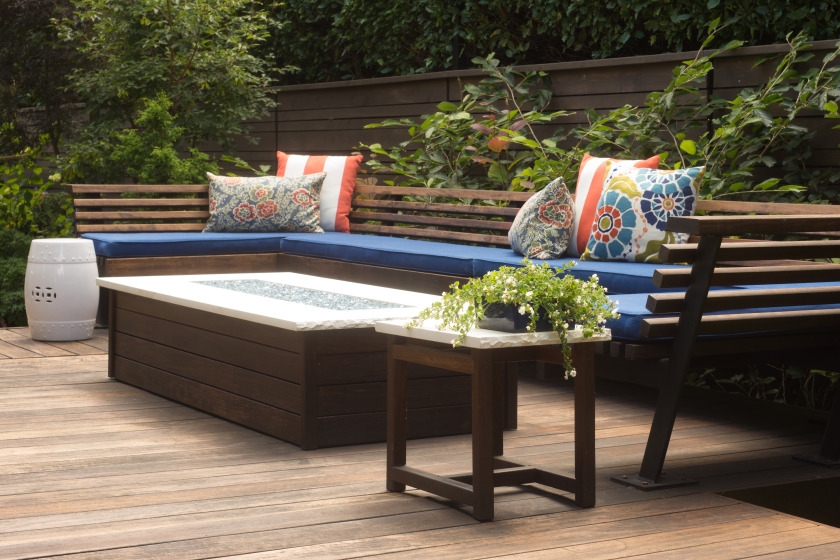
Your wood patio bench was once the best seat outside the house — a place to socialize, relax or just sit back and watch your garden grow. But age, wear, sun and rain can take a big toll on outdoor wood furniture, marring its surface and stealing its luster. Time to strip away the years and restore its beauty. Be sure to check the Project Shopping List and get the supplies you need at your local True Value hardware store.
Step 1: Strip Off the Old Finish
Old, weathered stain or paint can become dull and lifeless, so it’s tempting to just cover it. But a fresh coat won’t adhere or wear well if it’s not applied over a clean, smooth surface. Instead of covering the old finish, remove it with a chemical stripper or heat gun.
Work in a well-ventilated area such as the patio or open garage. Make sure your work area is dry and dust-free. Use masking tape to secure a large drop cloth or tarp to the ground or floor to prevent potential stains.
Remove any flaking, loose paint or varnish with a paint scraper. Using a medium-sized paintbrush, apply Woodsman Premium Wood Stripper evenly over the surface in a thick coat with a single pass of the brush. You don’t have to brush it out the same way you would a coat of paint. Let it soak in for 20 to 30 minutes, wait until the finish has bubbled up, then remove the old finish using a plastic scraper or round-edged putty knife. The surface may be soft so be careful not to damage it with the scraper. Allow the bench wood to dry completely.
Safety Alerts!
Always follow manufacturer’s instructions and wear rubber gloves and protective goggles when using strong chemicals.
Never strip furniture near an open flame as chemicals can ignite.
Helpful Tip
Use chemical strippers clearly marked “no cleanup” or “will wash away with water.” However, the “no cleanup” type stripper may leave a residue, which must be sanded away. Residue from the “wash away” type can be removed by rinsing with water. Be aware that water may raise the grain of the wood. Lightly sand to reduce this effect.
A heat gun is a quick and effective way to remove the finish from flat surfaces. Heat a small area of the bench with the heat gun until the finish bubbles up. Then scrape off the residue into a plastic bag or other container.
Helpful Tip
The heat technique can leave residue in the pores of the wood or in detailed areas and crevices that can’t be scraped away. If that starts to happen, stop using heat and apply a chemical stripper to finish the job.
Safety Alert!
Always wear a heavy glove on the hand you’ll be using to hold the heat gun and scraper because heat guns get very hot.
Step 2: Sand It
The more thorough you are during the stripping process, the less you’ll need to sand. Start sanding with medium/low-grit sandpaper to clean off any finish that remains and smooth out any imperfections in the wood. Then smooth the whole bench down with medium-grit sandpaper. Be sure to sand along the grain of the wood. Do this carefully as any swirl marks caused by sanding will stand out when you stain.
Step 3: Stain It
If you want to enhance the color of the wood, use Woodsman 100% Acrylic Water-Repellant which will seal the surface and enhance the color. For a richer look, use a product such as Woodsman 100% Acrylic Wood-Toned UV Wood Sealer & Protector. Oil-based stains penetrate into the wood without raising the grain but carry a strong odor. Water-based stains are more environmentally friendly and offer easy cleanup using soap and water. Never use deck stain on furniture. Apply one even coat of stain with a cloth or medium-sized paintbrush and allow it to penetrate into the wood. Wipe off excess stain with a clean cloth and allow the piece to dry completely.
Safety Alert!
Never refinish near an open flame as stains can ignite.
Helpful Tips
If using water-based stains, you can minimize raising the grain by moistening the wood with a damp cloth and sanding. Allow the wood to dry completely and sand lightly with fine-grit sandpaper. Repeat as necessary. When buying brushes, choose natural bristles for oil-based stains and latex bristles for water-based stains.
Step 4: Apply Sealant
Apply Woodsman 100% Acrylic Wood-Toned UV Wood Sealer & Protector to seal the new finish if the stain you used did not include sealant. Apply with a cloth or small- to medium-sized paintbrush in smooth, even strokes in the direction of the grain, holding the brush vertically while applying. Overlap brushstrokes as you move to the next area. Let dry completely between coats (one to two hours). Lightly sand the surface with fine-grit sandpaper, then use a cloth or brush to remove residue or debris from sanding. Apply the next coat and let dry overnight before using.
Well done! The project’s complete and your bench is fresh and renewed!
Project Shopping List
Here’s what you’ll need to complete this project successfully.
- Chemical stripper
- Heat gun
- Painter’s masking tape
- Drop cloth or tarp
- Paint scraper
- Medium-sized paintbrush
- Woodsman Premium Wood Stripper
- Plastic scraper or round-edged putty knife
- Rubber gloves
- Protective goggles
- Heavy glove
- Medium/low-grit sandpaper
- Medium-grit sandpaper
- Woodsman 100% Acrylic Water-Repellant Stain
- Small paintbrush
- Cloth
- Woodsman UV Wood Sealer & Protector


